
For most people, their penmanship improves over time, but not me. Of course I have to be just the opposite. I write like a serial killer. These days, I hardly ever hand-write anything. The reason for that is because my handwriting is beyond terrible. You know it's bad when even I can't read my writing. Whats worse is that my cursive is actually better then my printing. I feel sorry for anyone who has to read anything I write. Remember when you were leaning writing skills in elementary school? We had those nifty papers with the split lines to keep us on track. Like this:
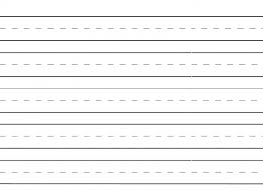
Why can't we use those as adults? It is my theory that if I could then people would actually be able to read my writing. Not too adult looking, right? Yet another reason I am grateful for computers. I find myself wanting to type out everything, even if it's just for my personal eyes.
Why am I typing this onto my craft blog? Because I love making cards for people, but hate that my handwriting messes up the pretty designs. In comes my Silhouette Cameo. I was using all the cut features for small phrases. However, what about when I wanted a nice saying inside the card? Even though the Cameo can cut small designs, it is not always possible to cut out longer things. Surprise! I am not the only one who thought this.
I found a great site that offered up an add on to the Silhouette Cameo and other die cutting machines. Amy Chomas at Chomas Creations has an adjustable pen and marker holder that can accept various sized pens and markers, then you put it in your machine instead of the cutting blade.

Awesome, right? Finally, writing that can be read. A tool that is on my crafting wish list (and believe me it's a long one).
The pen holder is beyond my means to invest in right now. So I researched other solutions.
Mycheap frugal self found these.


Small pen grips that you put on pens or pencils. I got a pack of 10 and put them on some gel pens. That was the hardest part of this project. It was tough, I tell ya. I needed a cup of coffee to relax afterwards. So after you calm down, you just push them into the blade housing.


To get them to write correctly I put in a spacer popsicle stick so that the pen did not drag along the paper. Amy Chomas suggested that we use setting of a speed of 10 and a thickness of 10 when using her adjustable pen holder, so I set my machine for the same. I found that some fonts work better then others. After like a million tests, I made a list and printed them out with my Cameo.

Oh so exciting. I'll be like a kid in a toy store playing with this. I have included a link to the .studio file I made just in case it helps anyone who has a Silhouette. Click here for file.
I Link up Here: Not just a Housewife, Clean and Scentsible, Skip to my Lou, I Heart Nap Time, Blooming Homestead, Alderberry Hill, Tatortots & Jello, A Night Owl, Crafts Ala Mode
Why am I typing this onto my craft blog? Because I love making cards for people, but hate that my handwriting messes up the pretty designs. In comes my Silhouette Cameo. I was using all the cut features for small phrases. However, what about when I wanted a nice saying inside the card? Even though the Cameo can cut small designs, it is not always possible to cut out longer things. Surprise! I am not the only one who thought this.
I found a great site that offered up an add on to the Silhouette Cameo and other die cutting machines. Amy Chomas at Chomas Creations has an adjustable pen and marker holder that can accept various sized pens and markers, then you put it in your machine instead of the cutting blade.
Awesome, right? Finally, writing that can be read. A tool that is on my crafting wish list (and believe me it's a long one).
The pen holder is beyond my means to invest in right now. So I researched other solutions.
My

Small pen grips that you put on pens or pencils. I got a pack of 10 and put them on some gel pens. That was the hardest part of this project. It was tough, I tell ya. I needed a cup of coffee to relax afterwards. So after you calm down, you just push them into the blade housing.


To get them to write correctly I put in a spacer popsicle stick so that the pen did not drag along the paper. Amy Chomas suggested that we use setting of a speed of 10 and a thickness of 10 when using her adjustable pen holder, so I set my machine for the same. I found that some fonts work better then others. After like a million tests, I made a list and printed them out with my Cameo.

Oh so exciting. I'll be like a kid in a toy store playing with this. I have included a link to the .studio file I made just in case it helps anyone who has a Silhouette. Click here for file.
I Link up Here: Not just a Housewife, Clean and Scentsible, Skip to my Lou, I Heart Nap Time, Blooming Homestead, Alderberry Hill, Tatortots & Jello, A Night Owl, Crafts Ala Mode


